Attaching a file to an email in Comcast Web Mail is very easy. Just follow these steps:
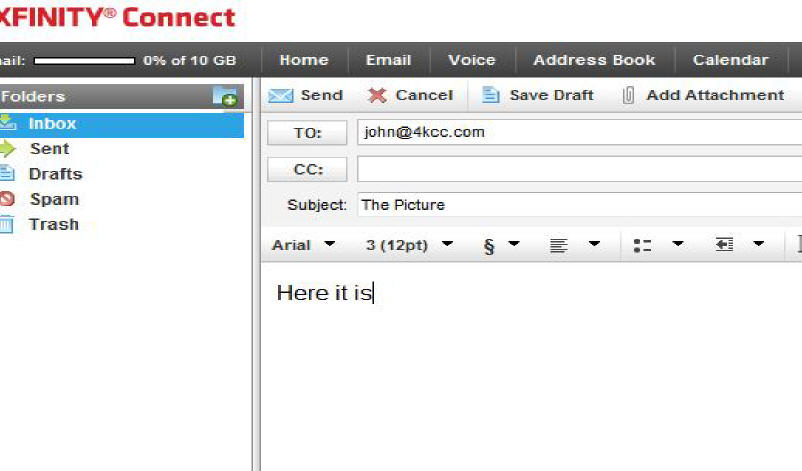
1) First, create an e-mail just as you always do. Fill in the address(es) of your recipient(s), your subject and write your message.
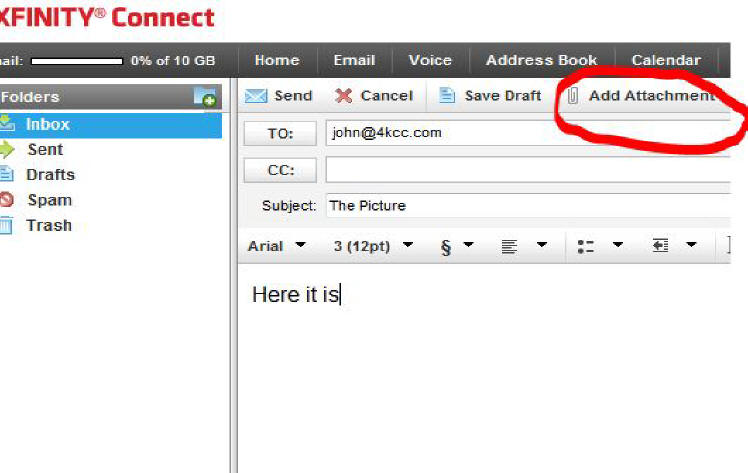
2) Next, click on ADD ATTACHMENT. (Paperclip icon)
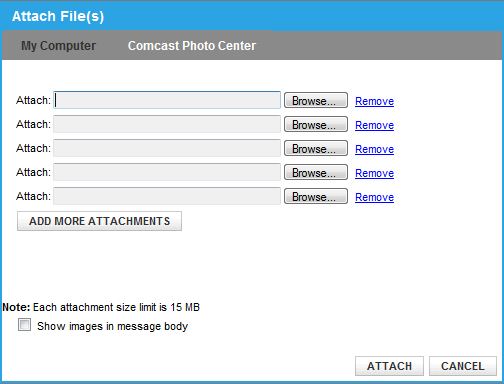
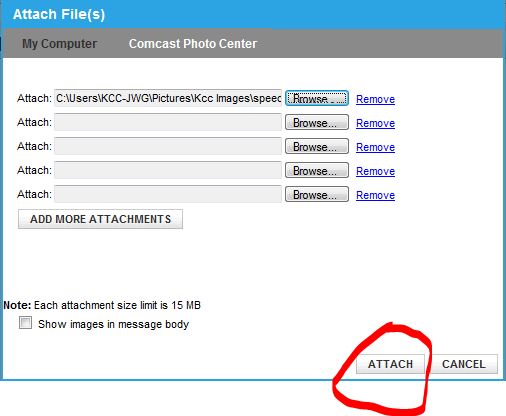
3) A new window appears with 5 fields to insert attachments. Click on the BROWSE button after the first field.
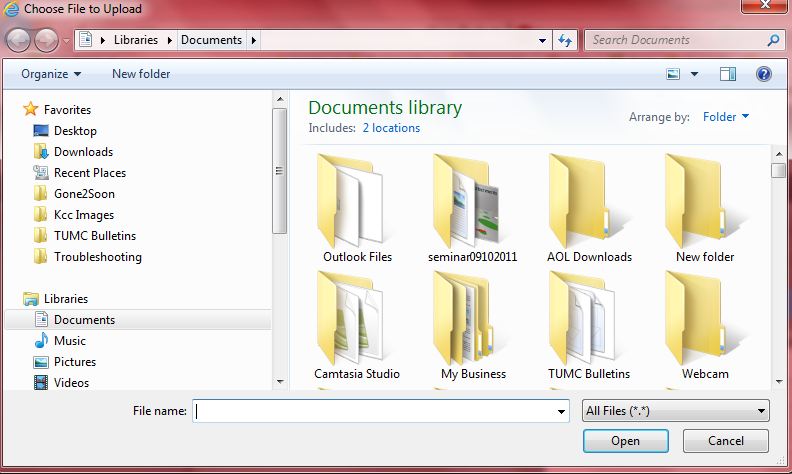
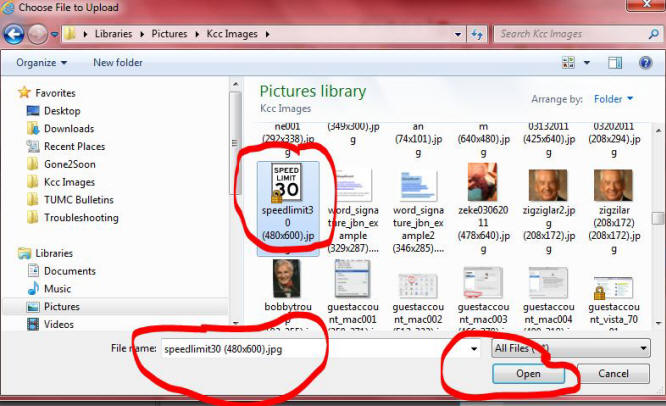
4) A new window appears. You will need to navigate to the file you want to attach. The top bar shows you your current location. You can use the left column items to find your file.
5) Once you find the file you want to attach, click on it once (highlighting it). Its name will appear below and you can then click Open.
6) The window with the attachment fields will re-appear. If you want to add more files, click on the next available BROWSE button and repeat the steps above. If you're finished, click on ATTACH.
7) Your email will now appear showing the attached file name and size of the file.
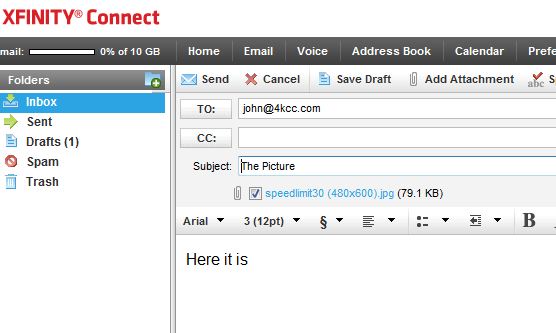
8) If you made a mistake and attached the wrong file or if it's too large to send via email, you can take the checkmark out of the box in front of the file name and it won't be sent. On the other hand, if everything is correct, just click SEND.